Neon signage has a timeless allure that captivates with its vibrant glow and retro charm. From illuminating city streets to adorning storefronts and homes, neon signs have become an iconic form of expression and communication. Crafting a custom design for a neon sign is an art form that merges creativity with technical precision. In this guide, we’ll explore the intricate process of creating bespoke neon signage, from conceptualization to installation.
Understanding Neon Signage
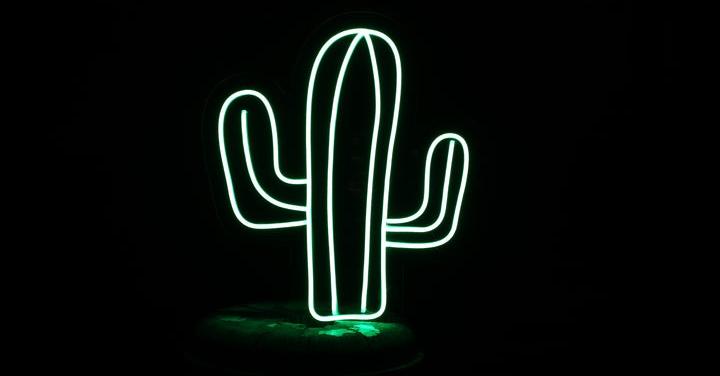
Neon signage utilizes noble gases, such as neon or argon, to produce light when an electric current passes through it. The distinct glow of neon signs is achieved by enclosing these gases within glass tubes filled with electrodes. When electricity is applied, the gas inside the tube emits photons, resulting in the characteristic luminous effect.
Designing a Custom Neon Sign
Creating a custom neon sign involves several steps, each crucial to achieving the desired outcome. Whether you’re designing a sign for commercial purposes or personal enjoyment, careful planning and attention to detail are essential.
Conceptualization
Begin by brainstorming ideas for your neon sign. Consider the message or image you want to convey and the intended audience. Whether it’s a company logo, a catchy slogan, or a whimsical design, clarity of concept is key. Researching popular trends and styles can also provide inspiration for your design.
Sketching
Translating your concept into a visual representation is the next step. Sketch rough drafts of your design, exploring different layouts, fonts, and graphical elements. Pay attention to scale and proportions to ensure readability and aesthetic appeal. Don’t be afraid to experiment with unconventional shapes or lettering styles to make your sign stand out.
Digital Design
Once you’ve finalized your sketch, digitize it using graphic design software like Adobe Illustrator or Photoshop. This step allows for precise manipulation of shapes, colors, and typography. Experiment with various effects, such as gradients or outlines, to enhance the visual impact of your design. You can also incorporate images or logos into your design, provided they are suitable for conversion into neon.
Selecting Materials
Choose the type of neon tubing and colors that best complement your design. Neon signs are available in a range of hues, including classic shades like red and blue and more exotic options like pink or green. Consider the ambient lighting conditions where the sign will be displayed to ensure optimal visibility. Additionally, select high-quality glass tubing that is durable and resistant to breakage.
Fabrication
Fabricating a neon sign involves several precise steps. First, the chosen glass tubing is heated and bent to match the contours of your design. This delicate process requires skilled craftsmanship and specialized equipment. Experienced glass benders use precision torches to heat the tubes evenly, avoiding cracks or deformities. Once the tubes are bent to shape, they are carefully cooled and cleaned in preparation for gas filling.
Gas Filling
After fabrication, the glass tubes are evacuated and filled with the appropriate noble gas. Neon gas produces a vibrant red-orange glow, while argon gas emits a blue hue. Combining different gases or coating the interior of the tubes with phosphor coatings can create additional color effects. The gas-filling process must be performed with precision to ensure uniform illumination and longevity of the sign.
Wiring and Assembly
After gas filling, electrodes are attached to each end of the glass tubes, and the tubes are sealed to maintain a vacuum. The electrodes are then connected to a power source via insulated wiring. Depending on the complexity of the design, multiple tubes may be interconnected to form the final sign. Careful attention must be paid to wiring and assembly to ensure proper electrical conductivity and safety.
Quality Control
Before finalizing the assembly, rigorous quality control checks are conducted to ensure the integrity and functionality of the neon sign. Each tube is inspected for leaks, proper gas pressure, and electrical continuity. Any discrepancies are promptly addressed to maintain the highest standards of craftsmanship. Quality control measures also include testing the sign under various lighting conditions to assess its visual impact.
Installation
Installing a neon sign requires careful planning and coordination to achieve the desired effect. Factors such as mounting location, power supply, and structural support must be taken into account. To minimize maintenance issues, professional installers ensure the sign is securely fastened and properly wired. Additionally, considerations such as weatherproofing and electrical safety codes must be addressed to ensure compliance and longevity of the installation.
Maintenance and Care
Like any illuminated signage, neon signs require regular maintenance to preserve their luminous brilliance. Periodic cleaning, inspection, and bulb replacement are essential to prolonging the lifespan of the sign. Protecting the sign from environmental factors, such as excessive heat or moisture, can prevent premature deterioration. Establishing a maintenance schedule and investing in protective measures can help extend your custom neon sign’s lifespan and visual appeal.
Conclusion
Designing a custom neon sign is a labor of love that blends artistic vision with technical expertise. Whether it’s a bold statement piece for your business or a personalized accent for your home, neon signage adds a touch of whimsy and sophistication to any environment. By following the steps outlined in this guide, you can bring your creative vision to life and illuminate the world with your unique style. Let your imagination soar and watch as your neon masterpiece shines bright for all to see. Remember, the process of designing a custom neon sign is as illuminating as the sign itself, offering endless opportunities for creativity and expression.